this is the final result:
heres how it was done:
although this project might have been completed in a few days, other projects required my attention, and as a result this project was ongoing for about 6 months..
It all began when I bought this funky instrument cluster in March .
the seller said it was a 1937 nash dash however I am not 100% certain this is accurate.
the auction ended with a low final price because the glass jewel was busted.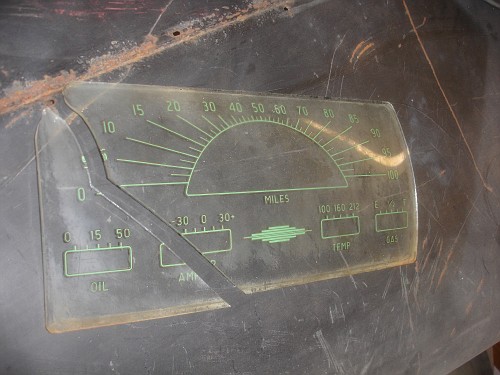
at first I wasn't quite certain what I would do with it..
but when I received it I quickly realized that I needed to somehow work it into the recycled 40 ford woodie.
because I had a fiberglass 40 dash, the choice to modify it was easy.. as the glass dash was otherwise junk to me anyhow..
luckily the radius of the new panel and the fiberglass repro dash were pretty close.. here is an early photo of the cluster installed in the dash.
obviously a solution to the broken glass needed to be developed.
on afternoon I shared my dilemma with one of my friends, and he suggested that if the part weren't "bent" that it could be laser engraved..
I knew how to unbend it.. so instantaneously a light went on!
the next morning I asked my friend who teaches black and white photography to make a print for me..
this is the result.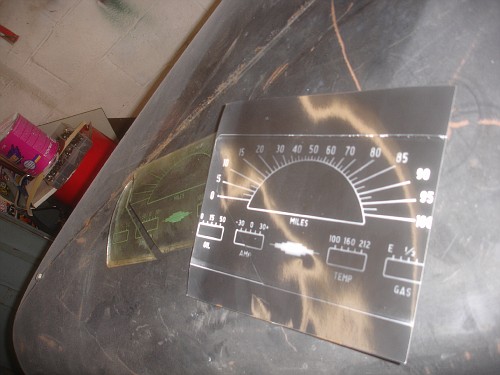
this was created by "taping" the photo paper to the inside of the original glass lens and then exposing the paper as if the original lens was the "negative"
after I had the black and white photo I scanned the the flat image into Photoshop where I did some quick touch up and minor "modifications" to the design..
a few days later I emailed the document (saved as a bitmap) to my friends Lorraine and Brian at Crown Trophy in Conshohocken, PA
who took my bitmap and laser engraved it.
a few days later, I picked up the finished parts..
because this wasn't a rush job, and because I had a million other projects going on I am only now finishing the assembly, however I must mention that Lorraines work is Stellar..
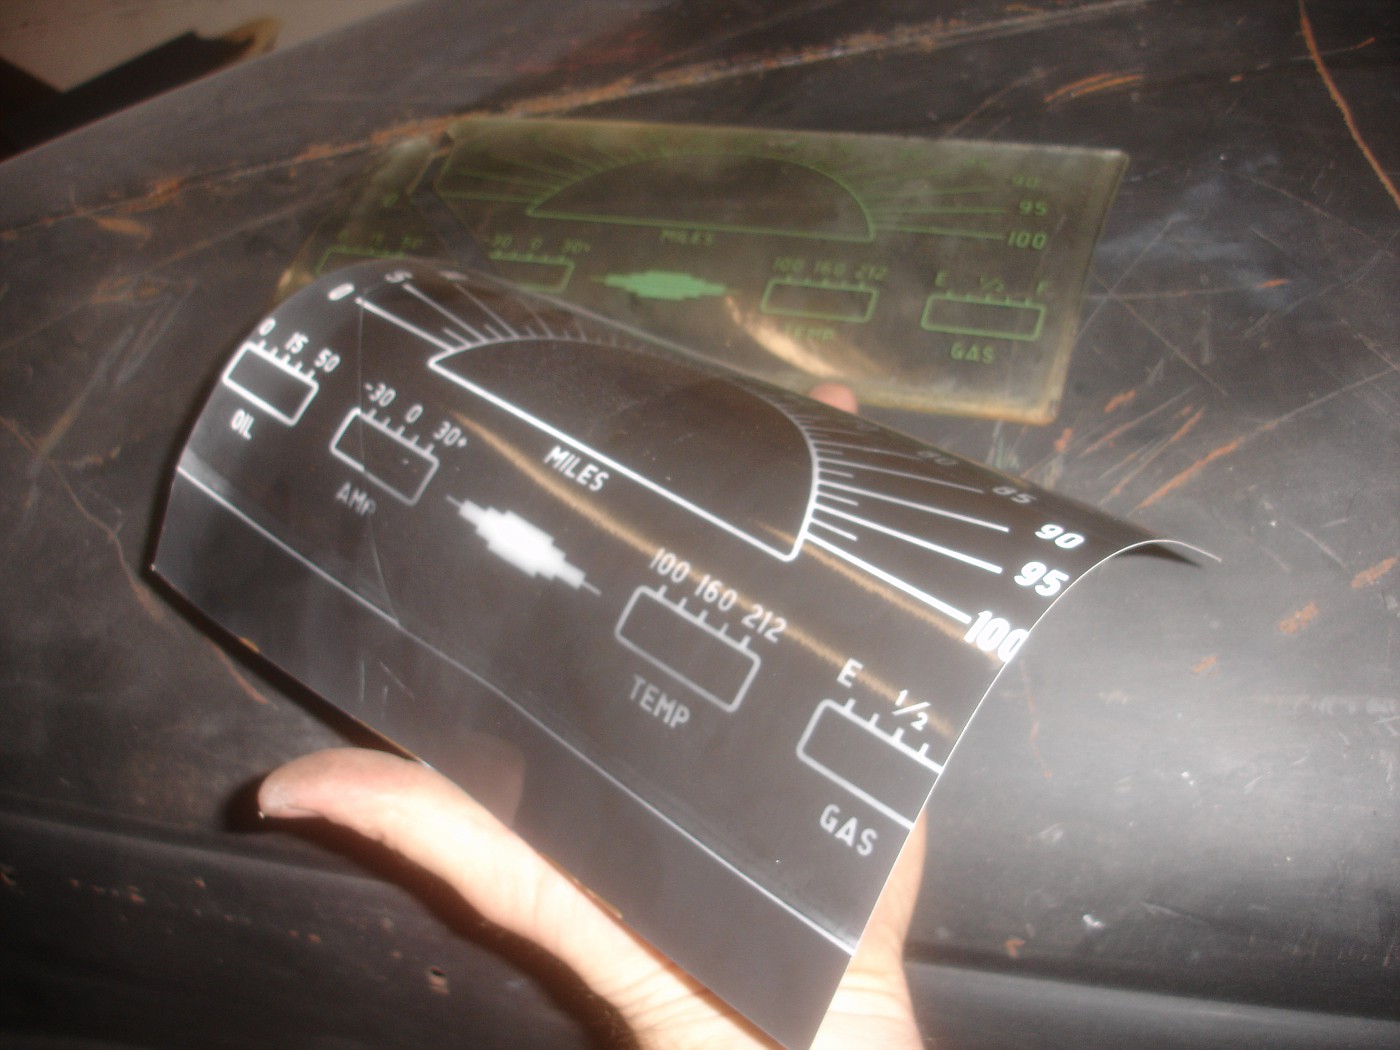
I forgot to take a photo of the plexi before I bent it, but I was able to create the appropriate radius with a heat gun and some patience
here is the finished PLEXIGLAS lens with the correct radius
the Plexiglas now fits into the original bezel that is glassed into the dash and the remainder of the cluster bolts into the rear. this is the result..
although it cant be seen from this photo the white faced gauges are new units mounted behind the cluster bezel, they are clearly visible from the front.. the speedometer head came from a jeep commando instrument cluster I had around.. and I used a race car harness disconnect to allow the dash to be removed easily..
I should be able to do a final install soon!
Wednesday, July 1, 2009
Dashboard TECH
Subscribe to:
Comments (Atom)

